In this article we discuss an installation of DDEX Provider for Microsoft Visual Studio 2017 or 2019. At this time (08/08/2017) there is still no DDEX Provider installer for Visual Studio 2017. The latest version is 3.0.2.0, which does not prescribe the required data source (Firebird Data Source) In the Visual Studio 2017 shell. This is due to the fact that Visual Studio 2017 started to use its private registry to store its settings, instead of the configuration file.
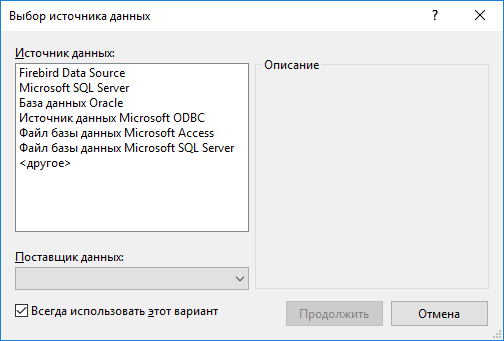
Initially, the list of sources looks like this:
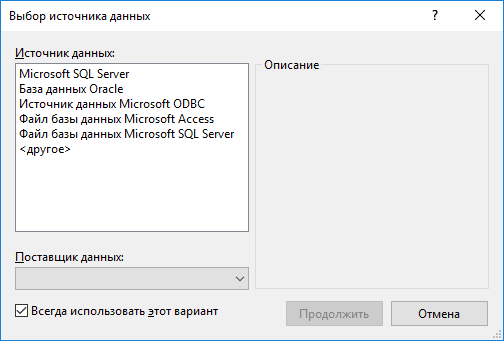
The goal is to have "Firebird Data Source" record being listed here. Detailed instructions below. The whole procedure will take less than 5 minutes in total.
Step 1: Install the DDEX Provider 3.0.2
Download DDEX Provider 3.0.2 and install it. Usually it is installed in the folder C:\Program Files (x86)\FirebirdDDEX.
Step 2. Preparing the reg-file
Download 32-bit or 64-bit version of the base reg-file, depending on the bit depth of your operating system. Locate the folder on your computer where the Visual Studio 2017 settings are stored. Typically, it is located at C:\Users\AppData\Local\Microsoft\VisualStudio. Find the folder which name starts with 15.0_. In this case it is 15.0_3ab834cd.

Open the base reg file in Notepad and make the following changes:
###15.0_Config### to 15.0_3ab834cd (11 replacements)
###DDEX_PATH### to C:\\Program Files (x86)\\FirebirdDDEX (1 replacement)
Double-slashes are mandatory. The result file looks like this:
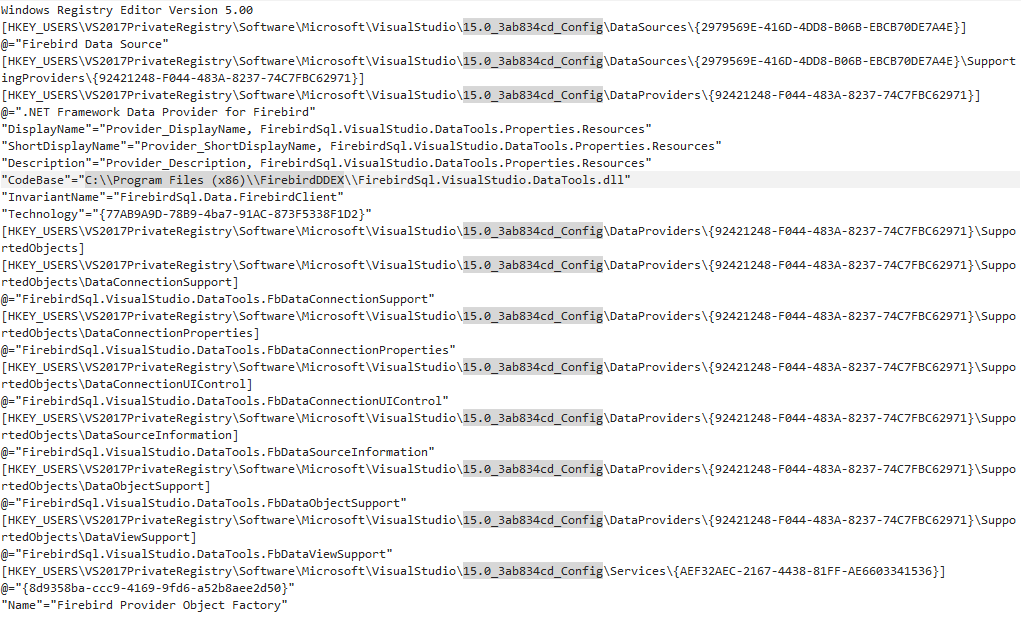
The reg-file is ready. Save it.
Step 3. Edit the private registry
Run Regedit. Highlight the HK_USERS section. Select File -> Load Hive. Select a file privateregistry.bin, which is located in the settings folder of Visual Studio 2017 (in this case C:\Users\AppData\Local\Microsoft\VisualStudio\15.0_3ab834cd). Specify VS2017PrivateRegistry as a name of the Hive
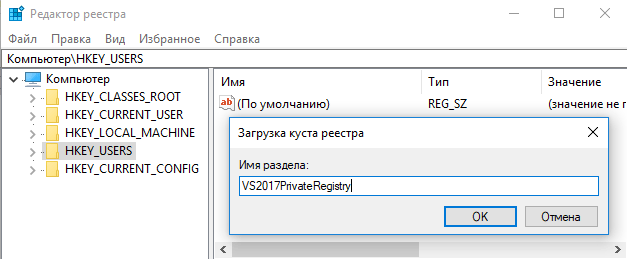
Click OK. Run on execution of the previously saved registry file or import it through regedit. Expand the HKEY_USERS section. Highlight the newly created section of VS2017PrivateRegistry. Choose File -> Unload Hive.
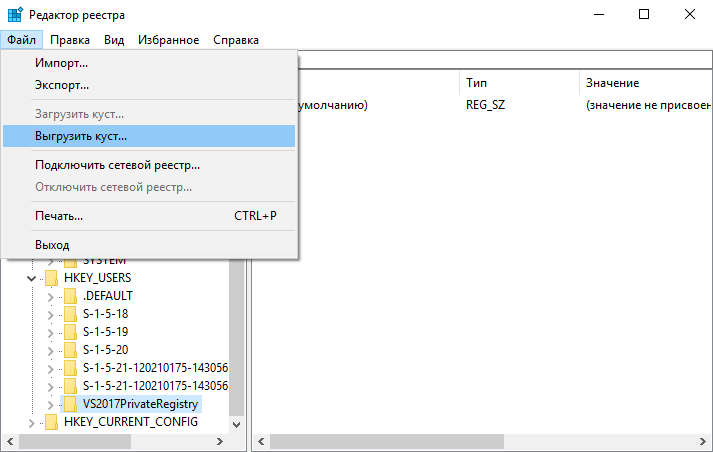
Run Visual Studio 2017 and check to see if the Firebird Data Source appears in the list.
Visual Studio 2019
Installation is pretty similar to VS2017, just change ###15.0_Config### to 16.0_46c7cf6b or whatever goes after 16.0_, also the hive's name must be changed to VS2019PrivateRegistry
 Online Service tools

